TrueNAS as a backup server
In this project I will dive into two phases: thinking and builind. The first will be the initial design phase and the second phase will be the actual construction phase from hardware to software configuration.
1. Thinking a backup server
Everything started from my desire to create a backup solution in case the hard drives in my NAS (Synology DS220+) fail or become unusable for any reason.
The reality is that some of the data stored on my NAS exists solely there, with no other copies elsewhere. This led to the need for a secondary location where I could store an incremental backup, allowing me to roll back if necessary.
So, the standard backup rule is the 3-2-1 strategy, for now, I'll skip the more advanced 3-2-1-1-0 rule, as I’m not dealing with mission-critical business data. In theory, I should maintain three copies of my data, with one stored offsite or in the cloud. While I already have access to various cloud storage options, my current focus is on creating an on-site backup. Ideally, this backup would be stored in a different physical location than my home, but I don't have access to a second home at the moment.
Once I decided that I needed a dedicated backup server, the next logical step was to define the ideal hardware setup to bring this idea still theoretical at this point in to reality. Drawing on past experience, I recalled that ECC (Error-Correcting Code) RAM is often recommended for backup servers, as it provides greater data integrity and is more reliable for systems where data integrity is critical.
What exactly do I want to do?
What I would like is a weekly backup.
Why?
Because I am willing to accept a week of delay regarding my data. I would also like to limit energy consumption as much as possible by turning on the backup server only when strictly necessary. Here's my strategy. All of these tasks will be done in series once a week (or multiple times a week if needed.)
- 📌 Start with WOL via Upspap >
- 📌 Start SMART CHECK and send mail notification >
- 📌 DO ALL Backups and mail notification >
- 📌 Start SCRUB and send mail notification >
- 📌 Automatic shutdown with I/O script >
Why ECC RAM?

ECC memory helps to detect and correct bit-level errors that can occur during data storage or transfer. In environments where data reliability is paramount—such as in a backup server storing large amounts of important data—using ECC RAM reduces the risk of data corruption, which could potentially compromise the integrity of your backups. For this reason, it’s often preferred in server and enterprise-grade systems, ensuring that even minor memory errors do not go unnoticed or unresolved.
Given my current setup, I am focusing on the on-site aspect of this strategy, meaning a local server that can handle regular, preferably incremental backups. Incremental backups, which only backup changes since the last backup, are more efficient in terms of both time and storage, especially as data grows over time.
The idea was to turn on the aforementioned backup server only once a week (or more times a week if necessary) in order to avoid having the hardware always turned on. This is very advantageous in my opinion because it allows you to create a copy of the data that is and will be practically almost always offline and therefore safe from any ransomware and potential attacks.
Hardware Selection
The first step in building this backup server is to list the necessary hardware. Since this server will be dedicated to backups, priority should be given to reliability and expandability. Some key considerations include:
-
Processor: While backup operations aren't typically CPU-intensive, it's essential to choose a processor that can handle the load efficiently. A low-power Intel or AMD chip would be sufficient for a backup server, but opting for a model with hardware encryption support can be useful for securing sensitive data. As said before this build will be built with ECC RAM, so as read from the motherboard manual I am limited to Un-buffered models. Surely, since ZFS tends to consume a lot of RAM and that RAM is important for good performance I will only take 16gb RAM modules so as to have a total memory of 32gb at the moment.
-
Motherboard: Choosing the right motherboard is critical to ensure compatibility and room for future upgrades. In my case, I opted for a motherboard that supports the AM4 socket, specifically with the B550 chipset. The B550 offers a good balance of performance and affordability, while still supporting AMD Ryzen processors, which are well-suited for both home and small office NAS systems. A key requirement for this build is having at least two PCIe slots. This is important for future expansions, such as adding a high-speed network card or additional NVMe storage via a controller card. Furthermore, the motherboard needs to support PCIe bifurcation, which allows the division of PCIe lanes from one slot into multiple devices. This feature is crucial if you plan to install multiple NVMe SSDs in a RAID configuration or other devices that demand high bandwidth. Another vital aspect is support for ECC (Error-Correcting Code) RAM, specifically unbuffered ECC. ECC RAM detects and corrects memory errors, significantly improving data integrity. This is particularly important in a NAS environment where data reliability is essential. Not all consumer-grade motherboards support ECC RAM, so it’s crucial to ensure the chosen motherboard has this capability, especially if you're building a backup server that handles critical or important data.
-
RAM: As said before this build will be built with ECC RAM, so as read from the motherboard manual I am limited to Un-buffered models. Surely, since ZFS tends to consume a lot of RAM and that RAM is important for good performance I will only take 16gb RAM so as to have a total memory of 32gb at the moment. So the two modules that are officially supported by the official site are these last ones:
📌 CRUCIAL 16GB 2Rx8 CT16G4WFD8266 DS Micron CL19 1.2v 2666
📌 CRUCIAL 16GB 2Rx8 CT16G4WFD824A.18FB1 DS Micron CL17 1.2v 2400
On Amazon I saw some Hynix brand 16gb banks at a price of around 55 euros. From the feedback online I saw that they are also used in place of the aforementioned Crucial. So I decided that I will take two banks for a total of 32GB.
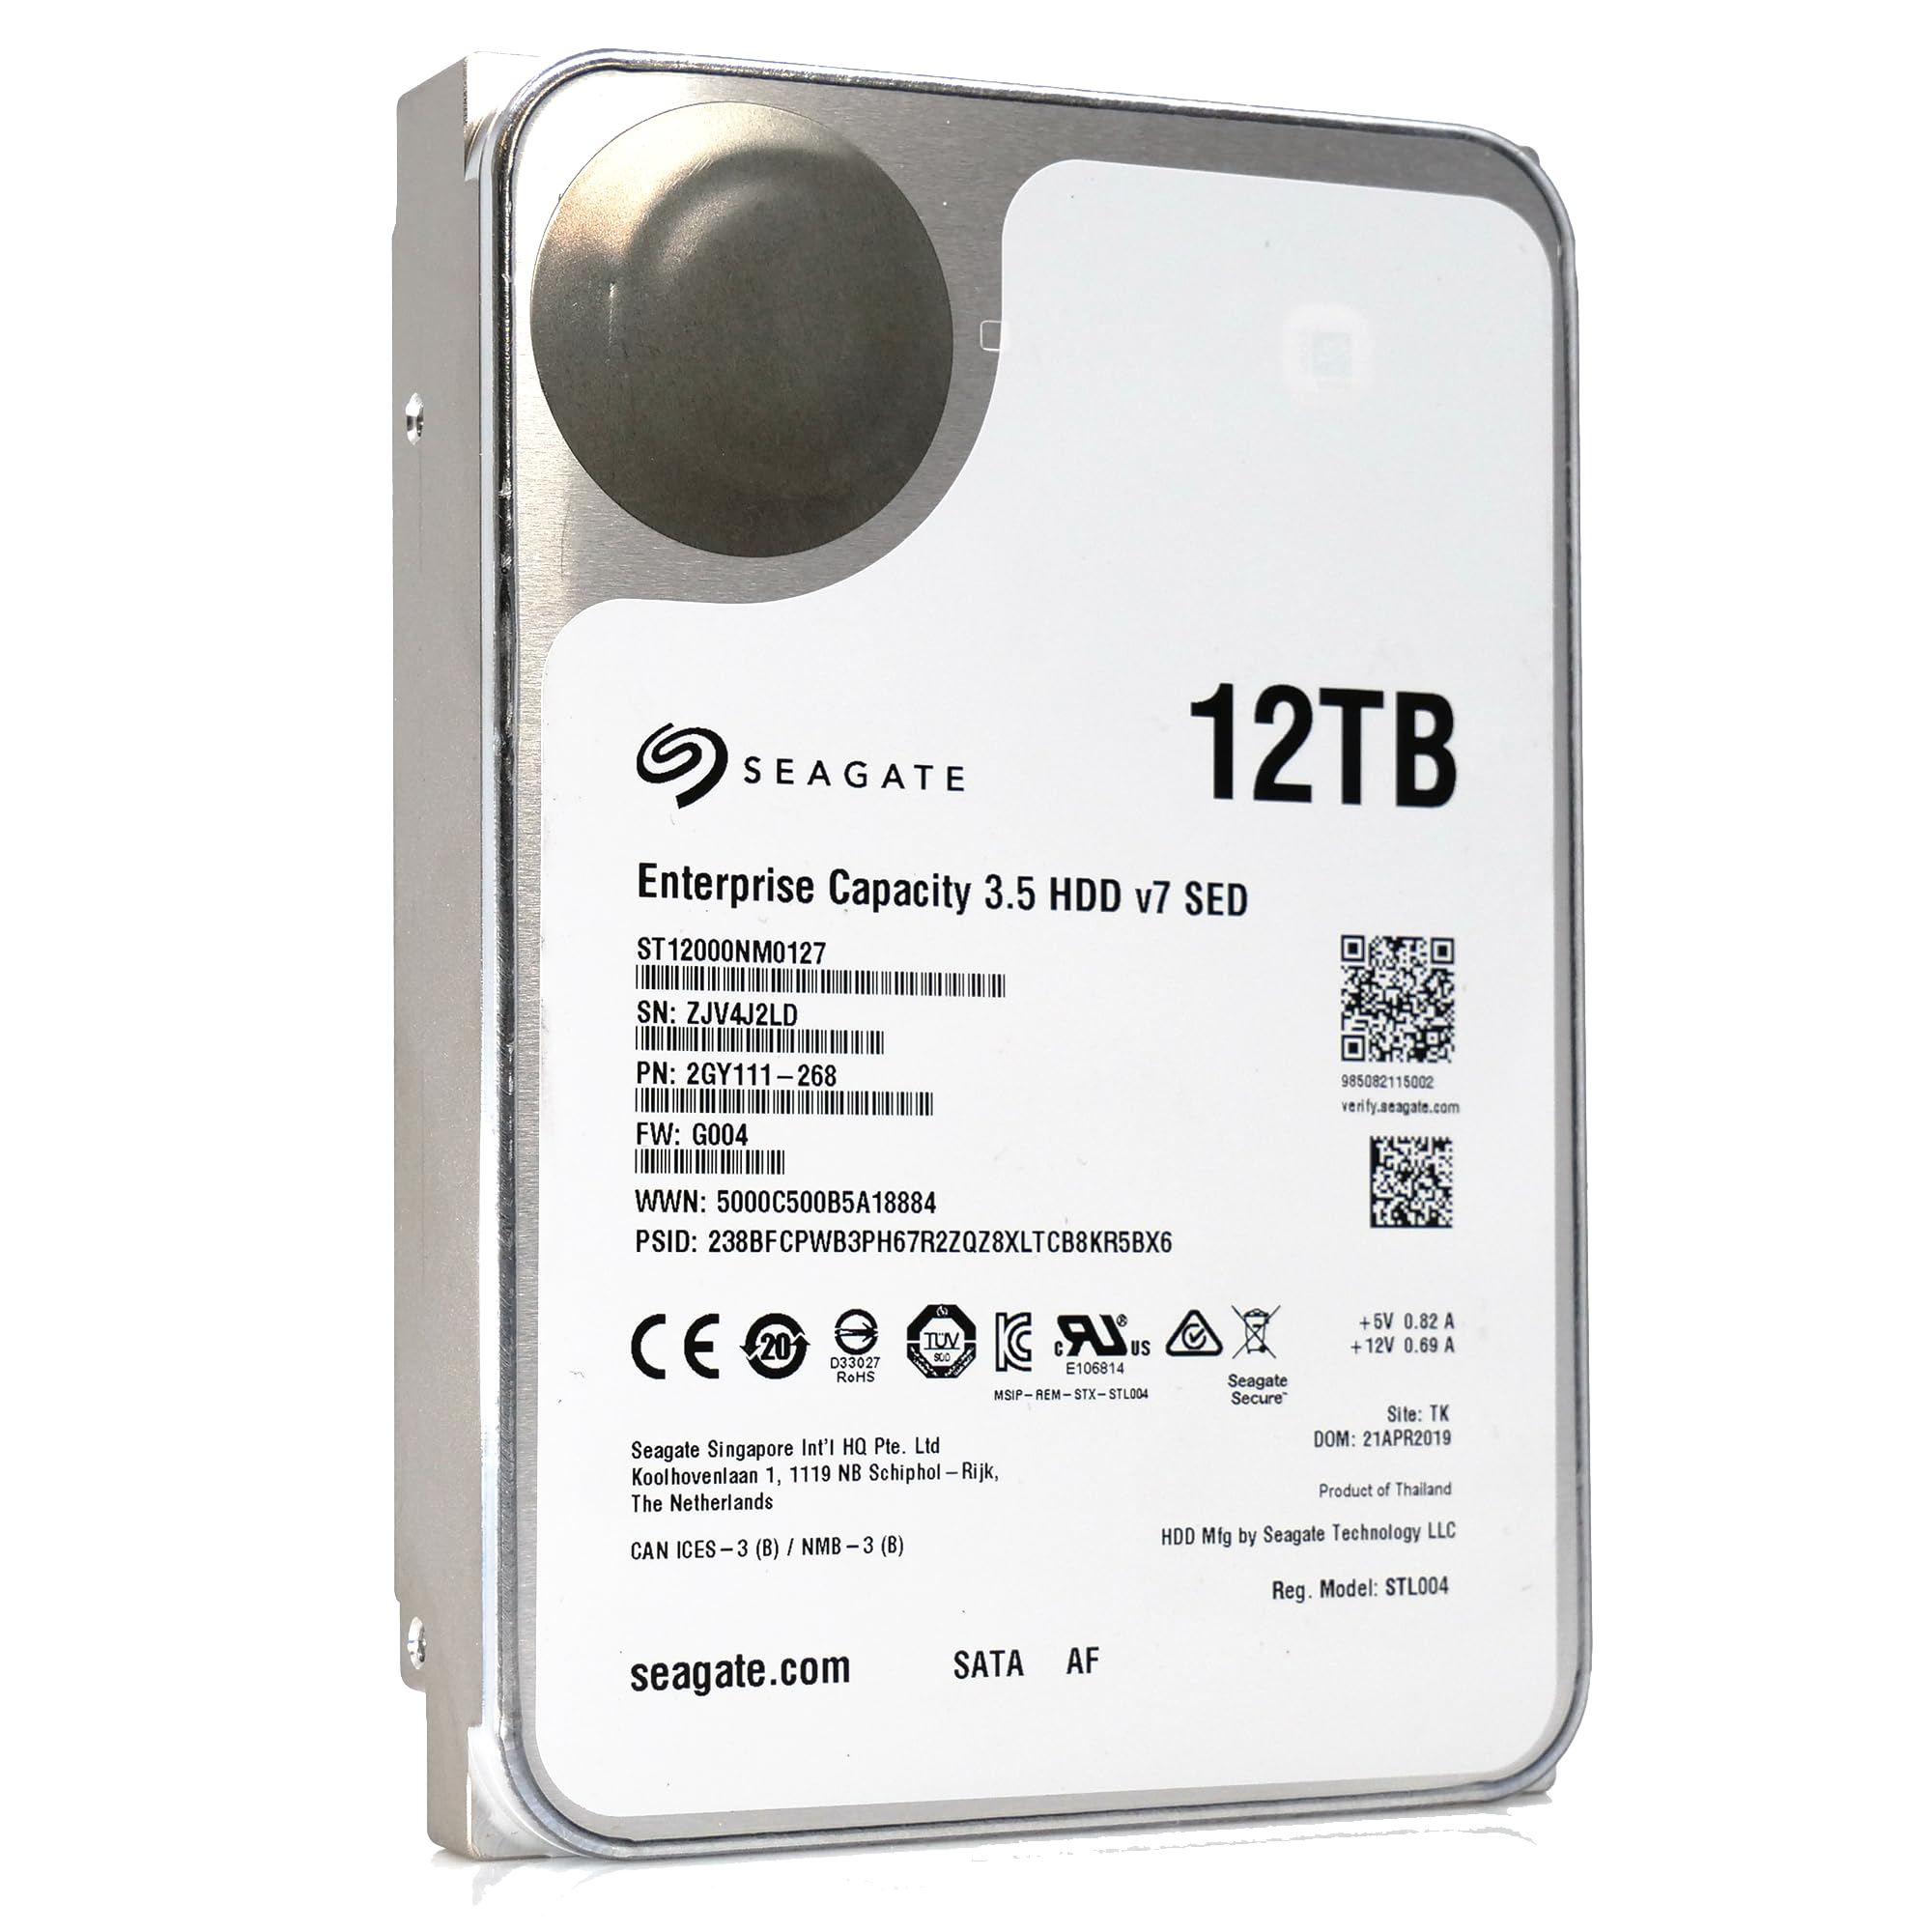
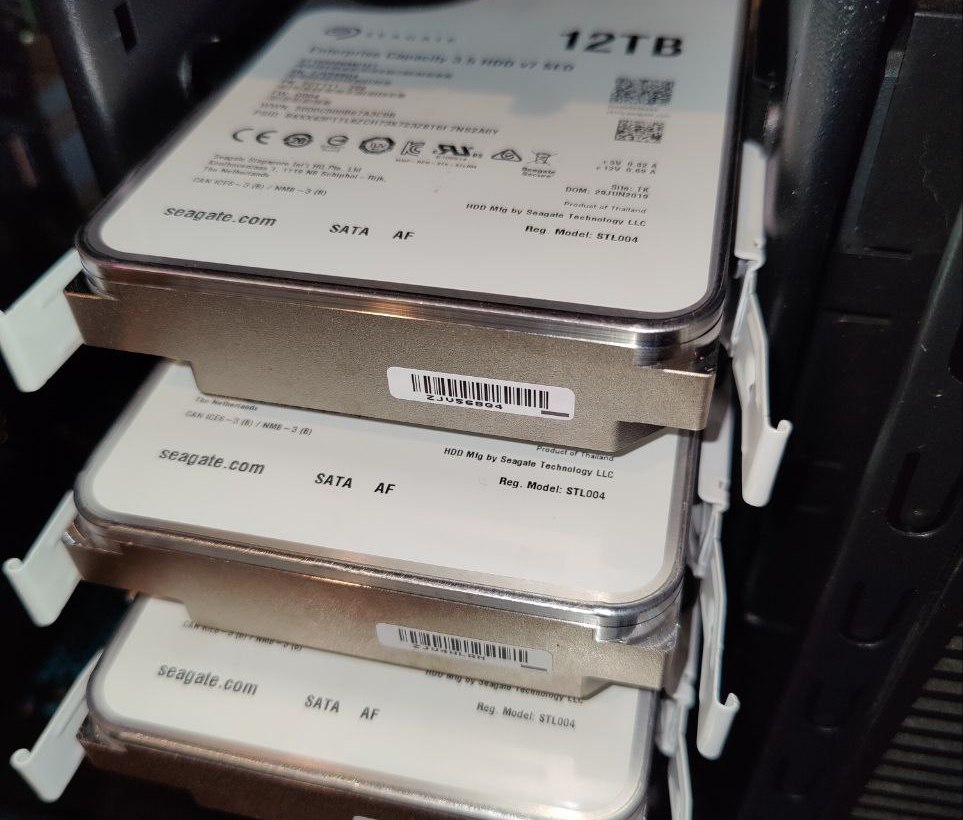
- Storage : For the backup drives, NAS-specific hard drives like the Seagate IronWolf Pro , Seagate EXOS or WD Red Pro are ideal, as they are designed to handle continuous operation and feature technologies like vibration control and error recovery for better long-term performance. On Amazon I found some refurbished HDDs with a 4-year warranty that are really tempting. A 12TB Seagate Enterprise V7 model costing around ~140 euros, including a 4-year warranty, would cost me around ~11.5Eur/TB, which is absolutely a good price! 😉 The idea was to take 3 and build a RAIDZ1. This way I will only have 33% of the entire space available, having the possibility of losing up to one disk, which is fine like this. The OS must also be redundant, so I will definitely think about installing the OS on a RAID1 SSD, possibly SATA so as not to waste M2 NVMe ports. The latter are in fact precious because it is possible to insert an adapter to have up to two SFF or MiniSAS outputs.
ZFS does not uniquely require ECC more than any other filesystem; the "scrub of death" scenario is basically bunk.
Generally speaking, people who run ZFS and deal with its quirks (especially around expansion) are very concerned about data integrity. ECC RAM prevents a type of error that ZFS can't effectively protect against, so it's (understandably) popular amongst ZFS enthusiasts.
-
Network:Since this server will be handling potentially large volumes of data transfer, the nas with 2Gb LAG connection and the switch that supports 2.5gbit speed I will definitely get a 2.5gbit ethernet card. Preferably Intel for the best compatibility with unix based systems. Surely an Intel i226 will do the trick for me.
-
Power Supply: A reliable power supply with sufficient wattage to support multiple hard drives and a case that allows for efficient airflow are essential for longevity and performance. In most cases an 80+ Bronze or higher will be more than fine considering that the backup server currently only needs to be on a few hours a week. A quick calculation of the power consumption tells me that this build will consume a maximum of about ~150 watts. Considering that a PSU is at its most efficient at 50% of its load, that this build will almost never be at its maximum load and that there may be future upgrades, a 300 watt PSU can be more than fine. And that's fine since I already have a 300 watt Delta PSU at home, 80+ Gold. Let's take a look at the various efficiency levels regarding PSUs.
| 80 Plus Efficiency | ICON | Rated Load Percentage | 10% | 20% | 50% | 100% |
|---|---|---|---|---|---|---|
| 80 Plus Standard |  | 80% | 80% | 80% | ||
| 80 Plus Bronze |  | 82% | 85% | 82% | ||
| 80 Plus Silver |  | 85% | 88% | 85% | ||
| 80 Plus Gold |  | 87% | 90% | 87% | ||
| 80 Plus Platinum |  | 90% | 92% | 89% | ||
| 80 Plus Titanium |  | 90% | 92% | 94% | 90% | |
| 90% | 92% | 94% | 90% |
We must not forget that a PSU has its maximum efficiency at ~ 50% of the maximum load. So if we take a 500watts psu but our average load will be 100watts, our psu will be super inefficient.

If you also have to do precise tasks with the backup server that is turned on only a few hours a week then energy efficiency is not that important. The cost of a new power supply (if you already have a good quality one) may never be fully amortized.
This is my estimate of the maximum expected consumption for the components I have in mind now.
| Device | Power Consumption (W) |
|---|---|
| mobo | 30 |
| cpu | 65 |
| ram | 3 |
| fans | 3 |
| heatsink | 3 |
| ssds | 5 |
| hdds | 30 |
| TOT | ~143 watt |
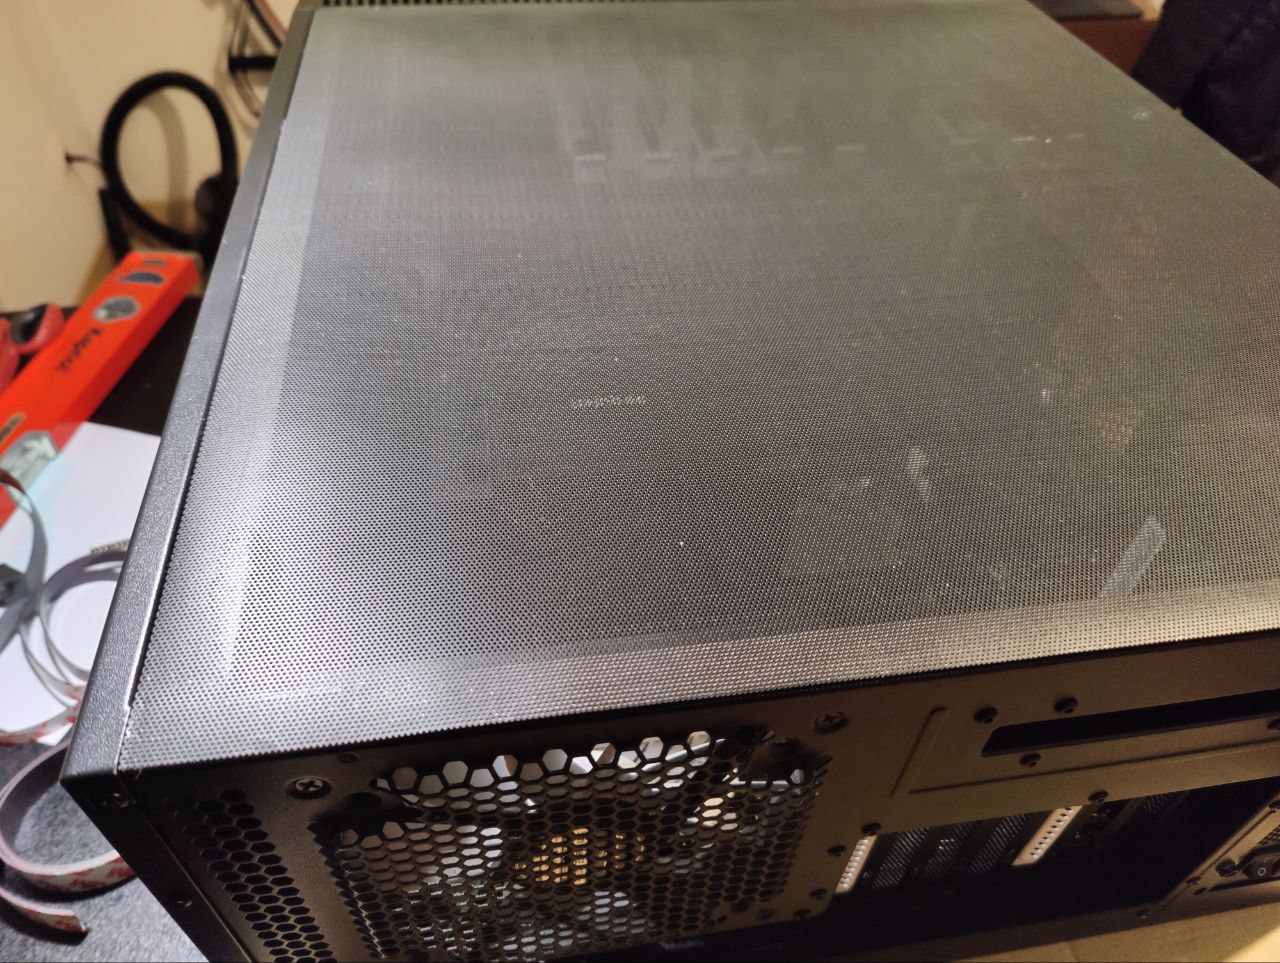
- Case: The case must definitely be well ventilated, possibly one that can be inserted horizontally into a 19-inch rack. After careful analysis on the web I discovered that the Fractal Define R5, not only had the possibility of hosting 8 or more 3.5-inch HDDs inside but also has the perfect dimensions to enter horizontally into a 19-inch rack. In fact, by removing the feet at the bottom the case should enter perfectly. The 8 spaces can therefore be expanded since the case offers the possibility of putting two 3.5 HDDs in the top and up to 3 3.5 HDDs (or 6 2.5 HDDs or multiple M2 NVMe SSDs) in the two upper 5.25-inch slots
In summary, after determining that a secondary backup system was necessary, my focus has shifted to creating a robust, reliable server using hardware that will ensure data integrity and protect against hardware failures or data corruption.
So I concentrated on this shopping list
- Case > Define R5
- CPU > 4650G R5 PRO
- Mobo > GIGABYTE B550M AORUS Elite
- RAM > x2 16 Go DDR4 2666 MHz Unbuffered ECC
- HDD > seagate enterprise v7 x3 ( for the storage)
- OS SSD > x2 silicon power ssd sata 250gb ( for the raid1 os)
- READ CACHE SSD > 512gb nvme pcie3 (already have)
- PSU > DELTA 250w - DPS-250AB-72 A - 80+ Gold (already have)
Potential future upgrade
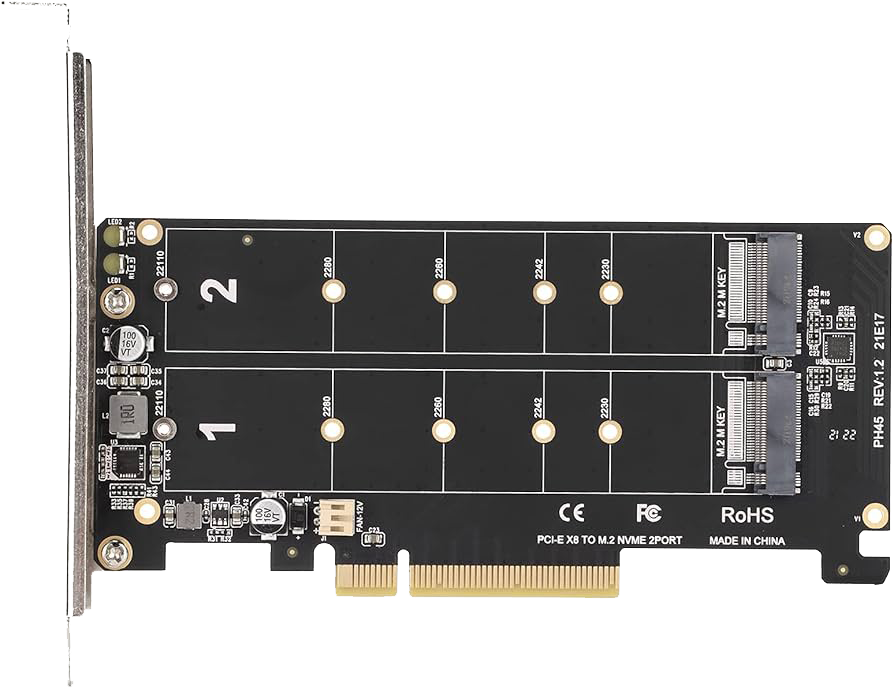
- PCIE Bifurcation : PCIe bifurcation is a motherabord feature that allows a single PCIe slot on a motherboard to split its lanes across multiple devices. This is especially useful for high-speed devices like NVMe SSDs because it enables the connection of multiple SSDs to a single PCIe slot by dividing its bandwidth into smaller chunks, rather than requiring a dedicated slot for each device. Example Use Case: 4x M.2 NVMe SSDs

- A PCIe LSI card.
A PCIe LSI card is a type of expansion card that uses the PCI Express (PCIe) interface to provide advanced storage capabilities. These cards are often used in servers, high-performance workstations, or enterprise environments to manage multiple storage drives efficiently. They typically serve as Host Bus Adapters (HBAs) or RAID controllers, allowing the connection and management of several SAS (Serial Attached SCSI) or SATA (Serial ATA) drives. LSI is a brand historically known for creating reliable storage controllers.
An example is a card like the Intel 9400, which features 4 SAS ports, where each SAS port can connect up to 4 SATA drives through breakout cables, offering the ability to manage up to 16 SATA drives. This makes it a valuable solution for storage arrays, data centers, or large-scale backup and retrieval systems where efficient drive management is crucial.
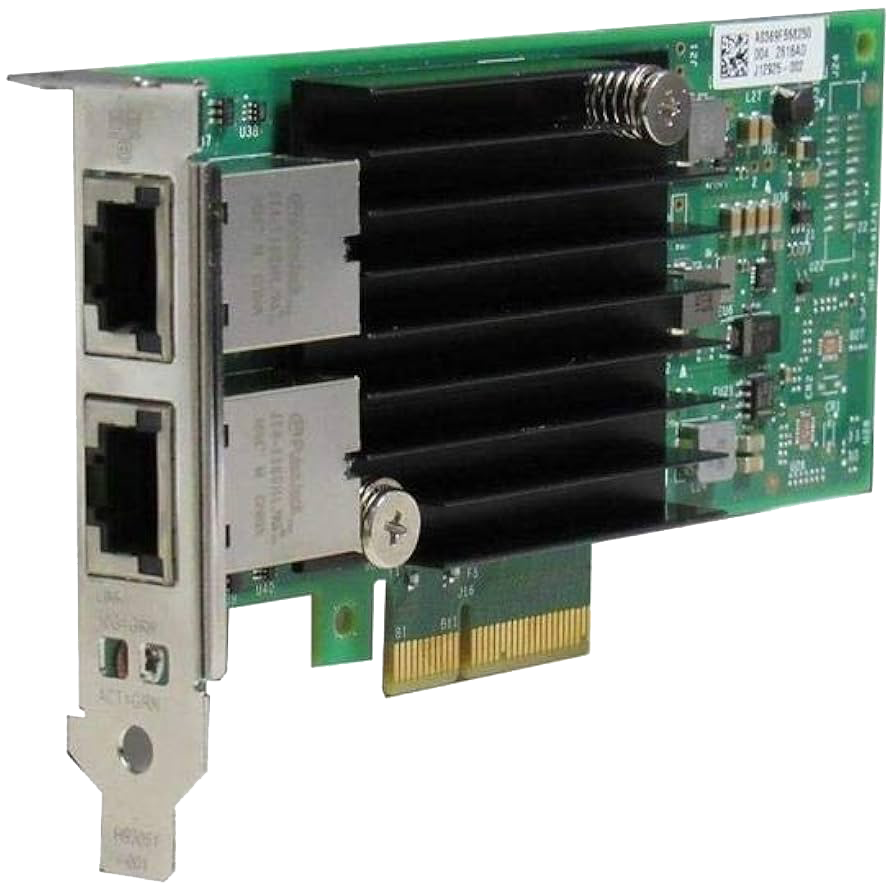
- NIC 10gbit eth or sfp+ Intel x550. For example, Intel X550 and Intel SFP+ network cards are both powerful networking solutions designed for high-speed data transmission. Here's a brief overview of their capabilities: Low Latency, 10 Gbe speed, PCIe 3.0 Interface, Backward Compatibility. In my case if I had a raid1 of ssd for a read/write cache it could be interesting 🚀
PLOT TWIST Unexpected 😀
After doing some research and asking around I was able to get a free PC with the following hardware:
📌 Case: define R5 without side bulkheads
📌 Mobo: Z590 D Gigabyte
📌 CPU : Intel i5 16000 k
📌 RAM: DDR4 16gb
📌 SSD: Sandisk plus SATA 256Gb
📌 PSU: ATX 850watt
📌 NIC: double Intel i226
So I decided to base my build on this hardware since the cost in this case will be extremely low compared to what was previously expected. Unfortunately this system is not compatible with ECC RAM so I will have to run it without ECC RAM. Maybe next time, dear ECC RAM!
Nevertheless, some purchases must be made to complete the build. Accessories regarding the case and HDDs must still be purchased.
On AliExpress I saw that there are some dust grills that can practically make the left side bulkhead of the case. In addition, I should also buy some magnetic/adhesive strips to ensure that the latter adheres perfectly to the metal walls of the Fractal Design R5. There are some screws missing on the PCIE slots so I will also order those.
So at this point the shopping list must be updated!
What i need now!
✔ m2 ssd screws 2.91 €
✔ Side bulkhead grille 5.79€
✔ Flexible magnetic band 7.35 €
✔ Sata power extender cable 3.5 €
✔ 3x hdd Seagate v7 enterprise refurbished with 4 years of warranty 443 €
| Product | Cost in € |
|---|---|
| m2 ssd screws | 2.91 € |
| Side bulkhead grill | 5.79 € |
| Flexible magnetic band | 7.35 € |
| Sata power extender cable | 3.5 € |
| 3x hdd Seagate v7 enterprise (4y warranty) | 443 € |
| TOT | 463€ |
2. Building a backup server
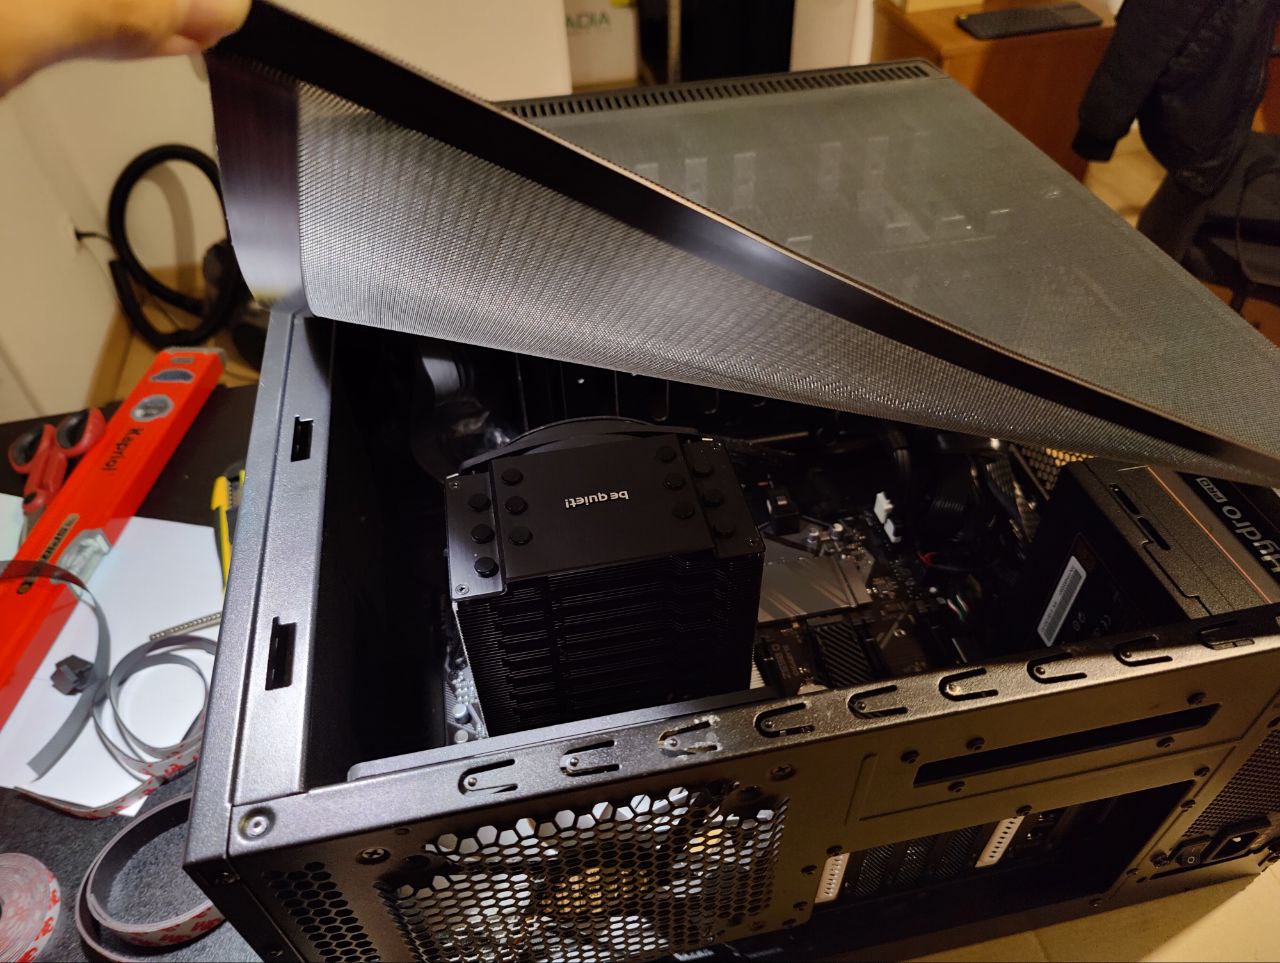
HW installation
As you can see the side bulkhead has been completely rebuilt with the help of a dust filter. The magnetic stickers on the edges made sure the bulkhead held well.
There was only one 140mm fan installed on the front, so another 140mm fan was missing. I had an unused 120mm fan at home, so I installed that one. I only have 3 3.5" HDDs, so it's not too bad for now. I'll upgrade if necessary in the future.
O.S. CHOICE
At first glance, only 3 O's come to mind regarding server backup, namely:


- TRUENAS SCALE
- UNRAID
- OPENMEDIAVAULT
- XPenology
After asking in the TrueNAS community, almost every person recommended the SCALE version over the CORE. It is true that the CORE version is more stable and solid, but it is also true that the SCALE version is much more up to date.
I tried UNRAID, it's very nice but the idea of paying every year or shelling out that much money for a license... meh... I'm not too convinced. Version 7 which is still in beta supports ZFS but is still in beta...
OMV is much improved from before but the other two OS seem more solid to me.
There was also another option, XPENOLOGY. Maybe virtualized on Proxmox but I didn't want to try for obvious reasons.
In the end my choice was TrueNAS SCALE 😀
Basic first operations
Once TrueNAS is installed (in raid1 on ssd) we start the basic configurations (even if some tests could have been done before)
- Static IP on the Intel i226 network card
- Correct time GMT+2
- OS update
- Complete SMART test to thoroughly test the HDDs
- Complete Memtest to deeply test the RAMs
- Add a user other than admin with specific permissions
- Configure alerts and enable reporting and stats
- Create APIs that will be necessary for the widget on the homepage container
So immediately after
- Add a storage Pools
- Create the datasets
- Configure SMB/NFS
Unfortunately I was not able to configure LAG (link aggregation) with WOL working. WOL only works on a single network card. But it doesn't matter since the mechanical HDDs don't go beyond 250mbs anyway.
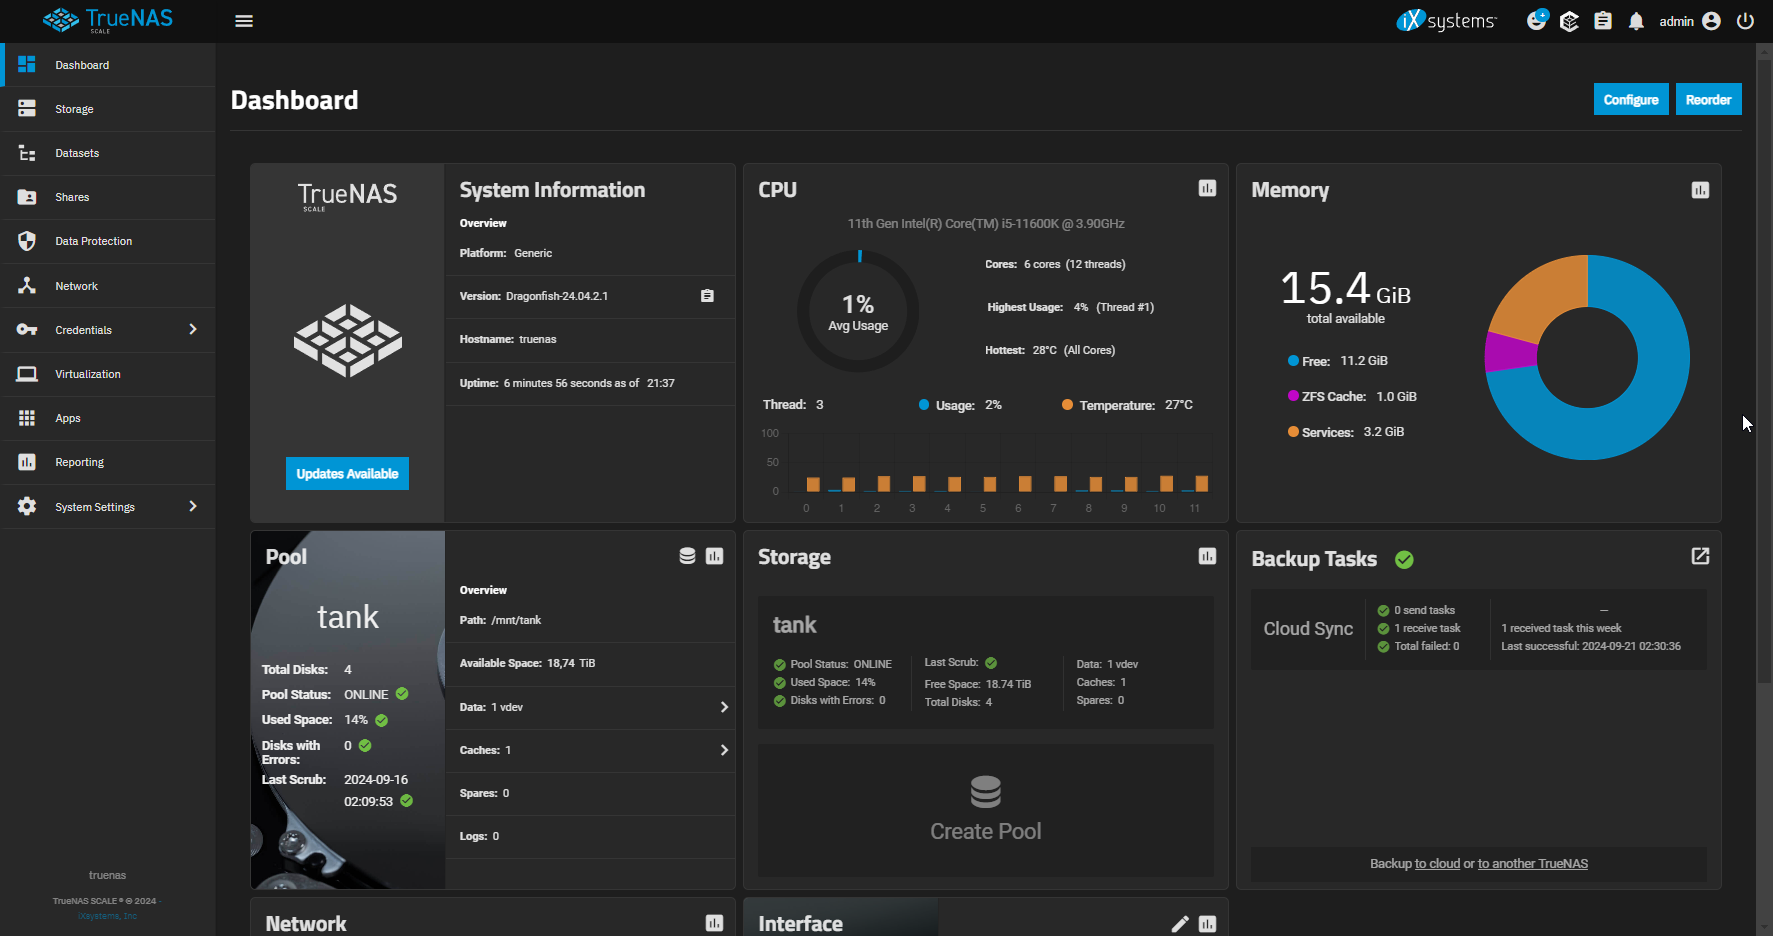
TrueNAS Dashboard
This will be the first thing you see when you are on TrueNAS, so the Dashboard. It is the main screen immediately after logging in. It can be customized. As you can see above there are buttons to order or configure other squares.
Modity session timeout 🌟
Sometimes it can be annoying to find the GUI disconnected and then log back in immediately via 2FA. In some versions of Truenas the timeout can be really short. In this case, just search via GUI for "session timeout" and you will immediately find the section where to change this parameter. I personally set it to 600 seconds, so 10 minutes.
Enable 2FA 🌟
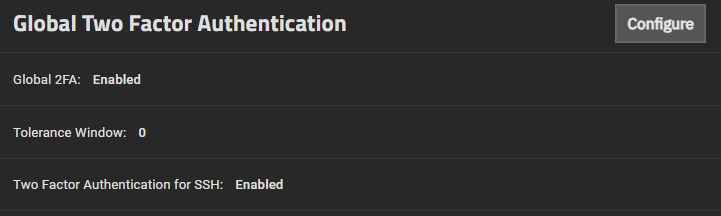
It is good to enable 2FA for obvious security reasons. This will also work in the SSH session. This setting can be found in the System > Advanced > Global Two Factor Authentication menu. An extra setting can be configured (Tolerance Window) to have flexibility of OTP code before and after the target interval.
Configure WOL via UpSnap 🌟

As you can, I configured WOL via the upSnap container that also gives me access to advanced features such as WOL scheduled via crontab. In fact, from the screenshot you can see the next boot via WOL. I also configured a link with direct access to TrueNAS, so that I can have direct access simply by clicking on the icon. I use it rarely since the whole configuration is automated and as we will see later the shutdown is automated if there is no activity detected within 1 hour.. It is possible, always via upsnap, to set a shutdown script. Here is mine:
curl -X POST "192.168.XXX.XXX/api/v2.0/system/shutdown" \ -H "Authorization: Bearer YOUR_API"
Check of boot pool
This is the interface where you can check the boot pool. As you can see in this case I have two ssd. A Sata ssd and a m2 nvme ssd.

Homepage Widget 🌟
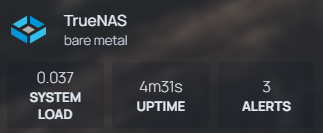
This is the widget configured on my Homepage container.
The configuration of this widget can be found here
The setup on the homepage is simple, just add the following code to the servies.yaml file. You will only need to add a few details such as the IP address and API key.
    - TrueNAS:
         icon: truenas.svg
         href: https://192.168.xxx.xxx/ui/sessions/signin
         description: bare metal
         widget:
           type: truenas
           url: http://192.168.xxx.xxx
           #username: user # not required if using api key
           #password: pass # not required if using api key
           key: API_KEY # not required if using username / password
           enablePools: true # optional, defaults to false
           nasType: scale # defaults to scale
Cron Job
Yes, it is also possible to configure cron jobs. Unfortunately, the GUI does not offer many customization options, so to access an advanced level of customization I can go through Script, therefore through this GUI that allows me to easily write the desired command directly. As you can see in this case I have configured two SMART tests and an rsync task.
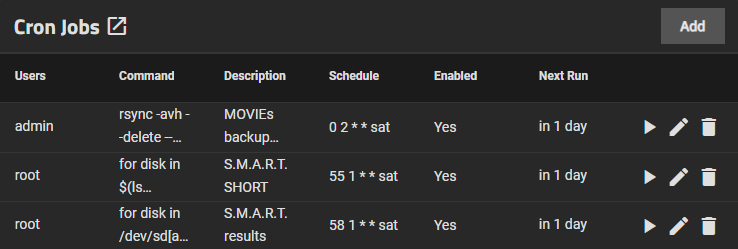
#Rsync script
rsync -avh --delete --stats /mnt/____/ /mnt/tank/______/
#SMART TEST Script short
for disk in $(ls /dev/sd[a-z]); do smartctl -t short $disk; done
#SMART TEST Script long
for disk in /dev/sd[a-d]; do smartctl -a $disk; done
Init / Shutdown Script

Here I have inserted a command that mount my external HDD mounted on Proxmox which has mostly miscellaneous media files. I need this to do a weekly rsync task which we will see later.
Before you think about it, NO. With TrueNAS you cannot set this via the fstab file. The fstab file is reset every boot for security reasons.
mount -t cifs -o credentials=/root/.smbcredentials,iocharset=utf8,vers=3.0 //192.168.xxx.xxx/____ /mnt/____
Shutdown Script
My goal was to create a script that monitors disk usage and shuts down disks if they are inactive for x amount of time.
Script Overview
This script monitors the disk activity of specific drives and, based on their usage, decides whether to shut down the system. It's designed to check the disk utilization percentage (%util) for the specified disks (in this case, sda, sdb, and sdd) every 15 minutes, collecting data every 10 seconds during that period. If the disk activity remains consistently below a certain threshold (3% utilization), it triggers a shutdown after notifying the user by email.
All the variables just indicated can be customized as desired.
Currently this script is in testing phase so I reserve the right to change the variables where I deem it necessary.
Detailed Explanation
-
Log Function:
- The
log()function appends messages to a log file (/home/admin/scripts/shutdown_on_idle.log) with a timestamp. It usessudoto ensure that even when run with elevated privileges, logs are consistently written by the same user.
- The
-
Monitored Disks:
- The script monitors the disks specified in the
disks="sda sdb sdd"variable.
- The script monitors the disks specified in the
-
Idle Check:
- The script runs in an infinite loop, checking disk utilization using
iostat. Every 15 minutes, it gathers disk utilization data (%util) fromsda,sdb, andsddevery 10 seconds for a total of 90 samples (15 minutes). - If the current day is Sunday between 1:00 AM and 5:00 AM, the script pauses its monitoring for 15 minutes to avoid unnecessary shutdowns during maintenance hours.
- The script runs in an infinite loop, checking disk utilization using
-
Disk Utilization Analysis:
- The script logs each disk's utilization value. These values are stored temporarily in
/tmp/util_values.txt. - After collecting 90 samples, the script calculates the average utilization of the disks. If the average utilization (
%util) is below the defined threshold (set to 3%), the script initiates the shutdown process.
- The script logs each disk's utilization value. These values are stored temporarily in
-
Shutdown Procedure:
- If the disk activity is consistently low, the script logs the event and sends an email notification to a specified address (
[email protected]) using Sendmail. - The system is scheduled to shut down after 6 minutes to ensure low usage persists.
- If the disk activity is consistently low, the script logs the event and sends an email notification to a specified address (
-
Log Management:
- To keep the log file size manageable, the script retains only the last 100 lines after each cycle. This ensures that the log file doesn’t grow too large over time.
-
Sleep and Repeat:
- After a monitoring cycle, the script pauses for 5 minutes before repeating the process.
Key Concepts
-
Disk Monitoring: The script uses
iostatto measure disk utilization. Low utilization indicates idle disks, which might trigger a shutdown. -
Scheduled Shutdown: If the average disk usage falls below the set threshold (3%), the script schedules a shutdown after a 6-minute delay.
-
Alert Notification: The system sends an email notification prior to shutdown, so users are informed before the system powers off.
This script can help save energy and resources by shutting down the system when it’s idle, especially for storage systems or servers that may not be constantly in use. It's particularly useful in scenarios where high uptime isn't required during off-peak hours.
It took quite a while to get it right.
The script
#!/bin/bash

# Path to the log file
logfile="/home/admin/scripts/shutdown_on_idle.log"

# Disks to monitor
disks="sda sdb sdd"

# Variables for calculation
total=0
count=0
threshold=3  # Set the %util threshold

# Log function with timestamp (writes as admin, even when using sudo)
log() {
    echo "$(date '+%Y-%m-%d %H:%M:%S') - $1" | sudo tee -a "$logfile" >/dev/null
}

# Full monitoring function (runs every 15 minutes)
full_monitor() {
    while true; do
        # Check if it's Sunday between 1:00 AM and 5:00 AM
        current_day=$(date +%u)   # Get the current day (1 = Monday, ..., 7 = Sunday)
        current_hour=$(date +%H)  # Get the current hour (00-23)

        if [[ "$current_day" -eq 6 ]] && [[ "$current_hour" -ge 0 ]] && [[ "$current_hour" -lt 6 ]]; then
            log "Script suspended: It's Sunday night (between 1 AM and 5 AM)."
            sleep 900  # Wait 15 min before check --- 1 hour (3600) before checking again
            continue
        fi

        log "Monitored disks: $disks"
        log "Full Monitoring %util for 15 minutes with sampling every 10 seconds..."

        # Run iostat every 10 seconds for 15 minutes (90 samples)
        iostat -x $disks 30 120 | awk '/^sda|^sdb|^sdd/ {print $NF}' | while read util; do
            if [[ -n "$util" ]] && [[ "$util" != "%" ]]; then
                util=$(echo "$util" | awk '{print int($1)}')  # Convert to integer
                log "Current %util: $util%"
                echo "$util" >> /tmp/util_values.txt
            fi
        done

        # Calculate the average of the collected values
        total=0
        count=0

        while read val; do
            total=$((total + val))
            ((count++))
        done < /tmp/util_values.txt

        # Remove the temporary file
        rm /tmp/util_values.txt

        # Calculate and log the average
        if [[ $count -gt 0 ]]; then
            avg=$((total / count))
            log "Average %util after 15 minutes: $avg%"

            # If the average is below the threshold, send an email and shut down the system
            if [[ $avg -lt $threshold ]]; then
                log "Average %util is below the threshold of $threshold%. Initiating shutdown..."

                # Send an email using Sendmail
                echo -e "Subject: TrueNAS - Imminent Shutdown\n\nThe system will shut down (+6min) because the I/O activity is low (average %util: $avg%)." | sudo sendmail [email protected]

                # Schedule a shutdown after 1 minute
                sudo shutdown -h +6 "Shutdown due to low activity..."
            else
                log "Average %util is above the threshold of $threshold%. No shutdown."
            fi
        else
            log "No valid values collected."
        fi

        # Keep only the last 100 lines in the log file
        log "Cleaning up log file, keeping the last 100 lines..."
        sudo tail -n 100 "$logfile" > /tmp/log_cleaned.txt && sudo mv /tmp/log_cleaned.txt "$logfile"

        # Wait 5 minutes before the next monitoring cycle
        sleep 300
    done
}

# Start the full monitoring function
full_monitor
Alternative shutdown strategy 🌟
We can adopt a different strategy by controlling the Truenas startup and shutdown completely remotely, for example using an application like Upsnap.
This could be the command for shutdown.
curl -X POST "[IP]/api/v2.0/system/shutdown" \ -H "Authorization: Bearer [TOKEN]"
In place of [TOKEN] and [IP] enter your information according to your system.
You can set the token via the icon at the top right of your profile, then clicking on "Api keys".
Configure rsync app 🌟
This is how to setup Synology's xHyper Backup app to backup to a TrueNAS system using rsync. To have compatibility with the Synology Hyper Backup, you need to install the rsync-daemon application. This will allow us, if we have a Synology NAS, to show it a Remote NAS to which to perform backups that can be either multi-version or single version.
📜The Dataset it refers to must be of type data.
📜Encrypted transmission is not always supported on Synology device.
Here are the settings I have set:
✔ Application name : Wished name
✔ Rsync port : 30026 ( standard port for rsyncd)
✔ Module name : Same name as target dataset
✔ Enable module : checked
✔ Host path : select the path to which rsyncd should point.
✔ Access mode : read/write
✔ Max Connections : Zero
✔ UID : UID of rsyncd user - (create specifii user for security reason)
✔ GID : GID of rsyncd user - (create specifii user for security reason)
✔ Host allow : enter the IP of the Synology NAS that needs to be interfaced - (it can create iussues)
I am inserting here an explanatory video that helped me a lot from YouTube
Conf. another backup strategy via rsync 🌟
This chapter was born from the need to backup a remote SMB/CIFS share.
First of all to simplify te task we need to mount a remote CIFS share.
So we need to config a init script like this:
sh -c "echo '//192.168.1.223/exos12tb  /mnt/exos12tb  cifs  credentials=/root/.smbcredentials,iocharset=utf8,vers=3.0  0  0' >> /etc/fstab"

mount -t cifs -o credentials=/home/truenas_admin/.smbcredentials,iocharset=utf8,vers=3.0 //192.168.xxx.xxx/xxx

systemctl daemon-reload
The problem is that this procedure is quite cumbersome, so it is better to go through systemd.
After this move we have two choices. Either adopt a GUI based strategy or a custom script based strategy.
Minio s3 storage 🌟

Is possible also to set a s3 storage via Minio. It could be interesting because many applications can now write to an s3 space including Synology and well-known applications such as Veeam or Duplicati.
But what is Minio ?
MinIO is an open-source, high-performance object storage platform designed to provide compatibility with the Amazon S3 API.
Built with simplicity, scalability, and reliability in mind, it is ideal for hybrid and multi-cloud environments, as well as on-premise deployments.
MinIO is trusted by enterprises globally for its ability to deliver scalable, high-performance object storage that is secure, resilient, and simple to deploy.
MinIO's core functionalities include:
- S3 Compatibility: Full implementation of the Amazon S3 API ensures seamless integration with existing applications.
- Scalability: Capable of scaling horizontally with distributed architectures.
- High Performance: Optimized for high-throughput, MinIO can handle demanding workloads such as AI/ML.
- Data Integrity: Built-in end-to-end data protection through erasure coding and bit-rot detection ensures maximum reliability.
- Advanced Features: Includes versioning, object locking, server-side encryption, and multi-user management.
I am inserting here an explanatory video that helped me a lot from YouTube concerning the integration with Synology.
Some details about the Destination configuration in Duplicati:
✔ Storage Type > S3 Compatible
✔ Use SSL > NO
✔ Server > Custom server url (192.168.xxx.xxx:9000)
✔ Bucket name > The bucket name in the Minio instance
✔ Bucket region > (default) ()
✔ Storage class > (default) ()
✔ Folder path > Path or subfolder in the bucket
✔ AWS Access ID > your access ID
✔ AWS Access Key > your access key
✔ Client library to use > MINIO SDK
It's very importante ti also enable advanced options to enable theses options :
✔ use-ssl
✔ accept any ssl ca or accept specified ssl hash
Check of Storage Dashboard
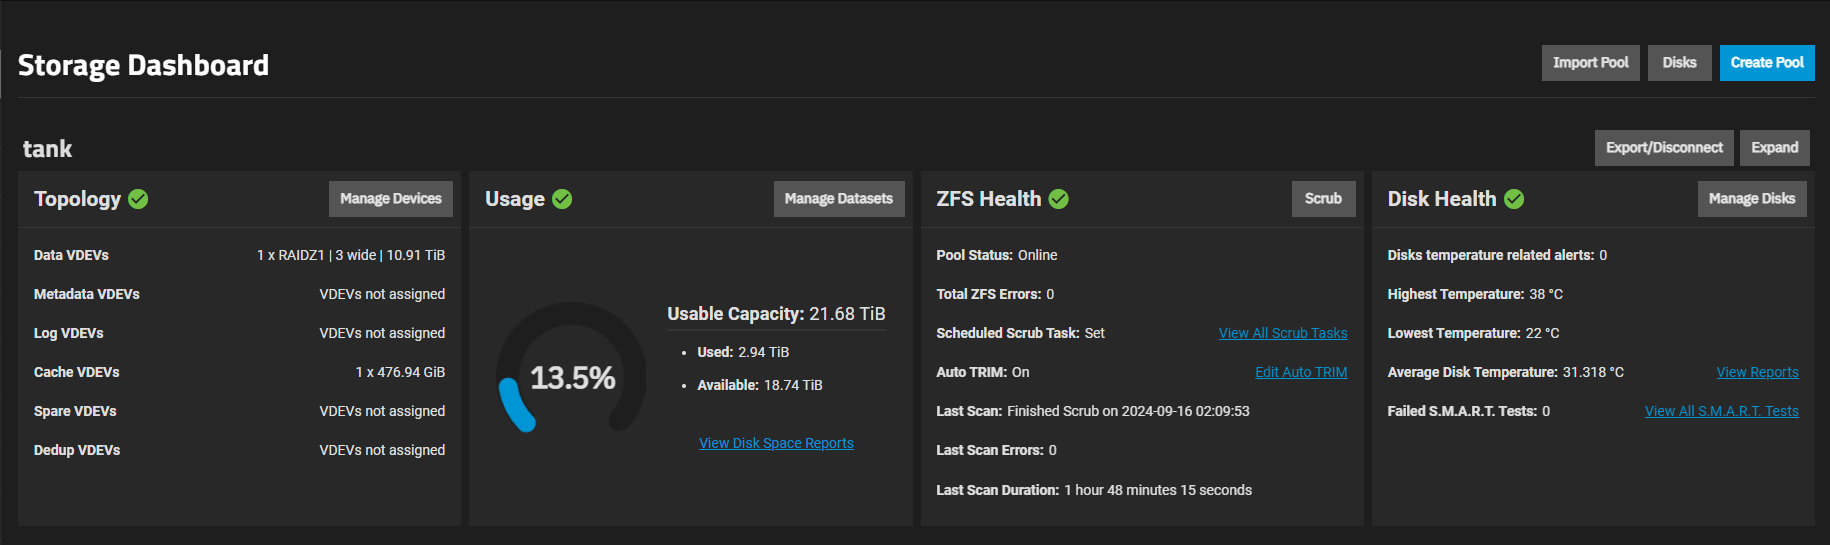
This Storage Dashboard provides an overview of the status of a TrueNAS storage pool the i called "tank." Here’s a breakdown of what each section of the dashboard shows:
1. Topology
- Data VDEVs: The system has 1 RAIDZ1 pool with 3 disks, providing a total storage capacity of 10.91 TiB.
- Metadata, Log, Spare, and Dedup VDEVs: These are currently not assigned, meaning there are no dedicated drives for metadata, logging, or spare purposes.
- Cache VDEVs: The system has 1 cache drive of 476.94 GiB, which is used to speed up read operations.
2. Usage
- Usable Capacity: The total usable capacity of the pool is 21.68 TiB. This number accounts for the redundancy in the RAID configuration.
- Used: 2.94 TiB of the pool’s capacity is currently used.
- Available: There are 18.74 TiB still available for use.
- 13.5% Usage: This shows a gauge of the current storage utilization.
3. ZFS Health
- Pool Status: The pool is online with no issues.
- ZFS Errors: There are no errors reported for the ZFS file system.
- Scheduled Scrub Task: Scrubbing is set up. Scrubbing checks the integrity of the data stored in the pool.
- Auto TRIM: TRIM is enabled, which helps maintain SSD performance over time.
- Last Scan: The last scrub completed on September 16, 2024, and it took 1 hour and 48 minutes. There were no errors found during the scan.
4. Disk Health
- Temperature Alerts: There are no alerts regarding disk temperatures.
- Highest/Lowest Temperature: The highest disk temperature is 38°C, and the lowest is 22°C.
- Average Disk Temperature: The average temperature is 31.3°C.
- S.M.A.R.T. Tests: No S.M.A.R.T. (Self-Monitoring, Analysis, and Reporting Technology) tests have failed. You can view the full list of S.M.A.R.T. tests from the dashboard.
Snapshots
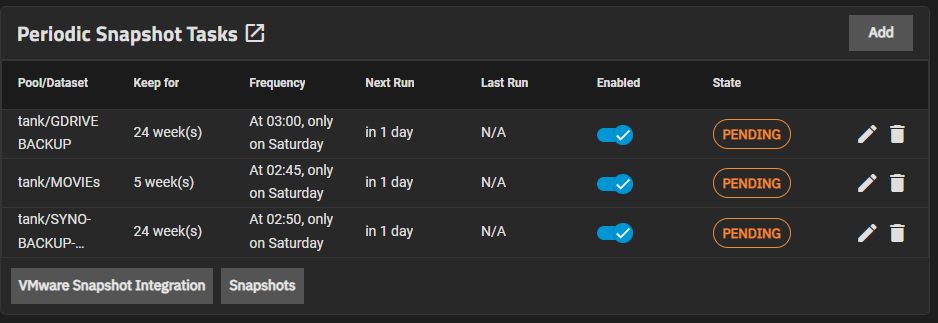
Snapshots in the ZFS filesystem are a powerful feature that allows users to take a point-in-time copy of data without duplicating the actual data. This functionality is particularly useful for backups, data protection, and quick recovery.
This Periodic Snapshot Tasks dashboard in TrueNAS displays the schedule and status of automated snapshot tasks. All tasks are in the PENDING state, which means they are waiting to be executed.
Cloud sync Tasks

Cloud sync tasks let TrueNAS integrate with a Cloud Storage provider for additional backup storage. Cloud Sync tasks allow for single time transfers or recurring transfers on a schedule, and are an effective method to back up data to a remote location.
Here you can take a look about all Cloud Sync Tasks that are supported by TrueNAS
Personally i have already configured Google Drive and Dropbox and it works very well.
All Google proprietary files (gdoc, gsheet...) are converted into the corresponding Microsoft Office type (.docs, .xlsx...)
SCRUB 🌟

In ZFS (Zettabyte File System), a scrub is a process that checks the integrity of the data stored on the filesystem. It systematically reads all the data on the disks and verifies it against the checksums that ZFS maintains for each block of data. If it finds discrepancies (i.e., data corruption), it attempts to repair the data by fetching the correct data from redundant copies (such as from a RAIDZ array).
A ZFS scrub is an essential part of maintaining a healthy and reliable ZFS filesystem. It ensures data integrity by detecting and correcting silent data corruption, thus safeguarding your data. Regular scrubs should be an integral part of your maintenance routine, particularly in systems with mission-critical data.
In this case I inserted the scrub at the end of my backup tasks to do a final check before shutdown.
Scheduling and measring every task
After testing the average time spent for each task and its performance I made a list of tasks ordered on a Google Sheet to have an overview of all the tasks performed each week. By doing this I have a clear view of everything that happens when the server is turned on. By doing this the troubleshooting will be easier in the future.
3. Vdsm via Portainer
Install Portainer
SO you can install Virtual DSM (VDSM) on TrueNAS SCALE using Portainer, which provides an easy way to deploy and manage Docker containers. By setting up Portainer on TrueNAS, you can create and configure a VDSM container through a Docker Compose stack.
you must first create a dedicated dataset on TrueNAS with the appropriate settings for applications. This ensures proper storage and functionality for Portainer and its containers.
Key Steps :
- Install Portainer on TrueNAS (if not already installed).
- Access Portainer's Web UI and navigate to Stacks.
- Create a new stack and paste the Docker Compose configuration for VDSM.
- Ensure proper network configuration, using Macvlan if needed, to allow DSM to obtain a dedicated IP.
- Deploy the stack, allowing Portainer to pull and run the VDSM container.
Install Vdsm
Configuring Macvlan on TrueNAS Before Deploying VDSM
Before deploying VDSM via Portainer, you need to create a Macvlan network on TrueNAS to ensure that DSM receives a dedicated IP address. This setup allows VDSM to function properly within your network.
Step 1: Enable SSH Access on TrueNAS
Since TrueNAS SCALE restricts SSH access by default, you need to temporarily modify the SSHD configuration to allow external SSH connections, making it easier to copy and paste the necessary commands.
- Go to TrueNAS Web UI
- Navigate to System Settings → Services → SSH
- Click on Edit and ensure the following options are enabled:
✅ Allow Password Authentication
✅ Permit Root Login (only if necessary) - Save the settings and start the SSH service if it’s not already running.
Now, you can connect to TrueNAS via SSH from your PC.
Step 2: Connect to TrueNAS via SSH
On your PC, open a terminal or PowerShell and connect to TrueNAS using SSH:
(Replace 192.168.1.xxx with the actual IP of your TrueNAS server.)
Once logged in, you can proceed with configuring the Macvlan network.
Step 3: Create the Macvlan Network on TrueNAS
Run the following command in the TrueNAS SSH shell to create the Macvlan network:
sudo docker network create -d macvlan \
    --subnet=192.168.1.0/24 \
    --gateway=192.168.1.1 \
    --ip-range=192.168.1.xxx/xx \
    -o parent=enp7s0 \
    vdsmlan
📝 Explanation of Parameters:
--subnet=192.168.1.0/24→ Defines the network range.--gateway=192.168.1.1→ Specifies the gateway IP.--ip-range=192.168.1.xxx/xx→ Assigns a specific range of IPs.-o parent=enp7s0→ Usesenp7s0as the parent interface.vdsmlan→ Name of the new Macvlan network.
Step 4: Verify the Macvlan Network
After running the command, check if the Macvlan network was successfully created:
docker network ls
You should see an entry for vdsmlan with the Macvlan driver.
To inspect its details, run:
docker network inspect vdsmlan
This will confirm that the subnet and parent interface are correctly configured.
Important Notes:
- This configuration is specific to your network, using
enp7s0as the parent interface and a subnet in the192.168.1.0/24range. - If your TrueNAS server uses a different network interface (e.g.,
br0,ix0), update the-o parent=parameter accordingly. - If your gateway or IP range is different, modify the
--gatewayand--ip-rangevalues as needed.
Next Step: Deploy VDSM via Portainer
Once the Macvlan network is set up, you can proceed with deploying the VDSM stack in Portainer, ensuring that the container is connected to vdsmlan to receive a proper IP.
🚀 Now you're ready to move forward with the installation via docker compose!
services:
  dsm:
    container_name: dsm
    image: vdsm/virtual-dsm
    environment:
      - CPU_CORES=4
      - RAM_SIZE=6144M
      - DISK_SIZE=22000G
      - DISK_FMT=qcow2
      - HOST_SERIAL=${serial}
      - GUEST_SERIAL=${serial}
    devices:
      - /dev/kvm
      - /dev/net/tun

    cap_add:
      - NET_ADMIN
    ports:
      - "5000:5000"
      - "5001:5001"
    volumes:
      - "${storagepath1}:/storage"
    stop_grace_period: 1m
    restart: on-failure

    dns:
     - 1.1.1.1
     - 1.0.0.1

    networks:
      vdsmlan:
        ipv4_address: ${macvlanip}

networks:
  vdsmlan:
    external: true
Tips to activate active backup for business
Open a new incognito tab in yout favourire browser and enter it in the address bar:
http://192.168.1.xxx:5000/webapi/auth.cgi?api=SYNO.API.Auth&version=3&method=login&format=%20cookie&account=<USERNAME>&passwd=<PASSWORD>
http://192.168.1.xxx:5000/webapi/entry.cgi?api=SYNO.ActiveBackup.Activation&method=get&version=1
http://192.168.1.xxx:5000/webapi/entry.cgi?api=SYNO.ActiveBackup.Activation&method=set&version=1&activated=true&serial_number=%220000000000000%22
Don't forget to enter your link, username, password, and serial number in the appropriate fields.
4. Resource Usage & Final Considerations
Power consumption
Measuring the consumption from the power outlet with a watt meter these are my current measurements:
✔ Idle = ~50 watts
✔ Backup in progress = ~110 watts
My SFF Delta UPS is 250 watts 80+ GOLD so according to the scheme posted before I should have about ~88% efficiency when the server is in Idle and about ~90% efficiency when the server is doing backup. Which is not bad! I consider myself satisfied!
Consideration
Setting up TrueNas was a lot of fun.
It has given me a lot of knowledge and insights into the world of OS for server backup purposes.
Surely a Synology NAS, a RS820+, a RS822+ or something similar would have been more than enough for my use. A RS1221+ would have been very future proof but now we are more in the "dream" part because the cost would be too big for my actual need.
I chose the custom solution largely because I got the basic components practically for free.
It is also towards which the custom solution offers me many advantages: the possibility of adding (in my case with u Define R5) up to x10 3.5 HDDs and up to x2 2.5 SSDs very easily. Some guys on reddit ( this guy or this guy ) even managed to add x16 3.5 HDDs !! 😲
Probably, if I have the chance I will buy another 12TB HDD to add it as a HotSpare HDD. So if by chance one HDD should fail, I already have another HDD ready that will automatically replace itself 😀
I'm not sure what the next upgrade will be in my HomeLab. Maybe the NAS. Currently my DS220+ is great, just a little slow when I go to view photos on Synology Photos. Probably the HDDs which are slow, the fact that it doesn't have the ability to put a read cache ssd doesn't help me. Also the fact that I don't have the option of a 2.5gbit NIC bothers me a bit. A DS923+ would be a great possible candidate for the future.